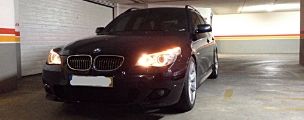
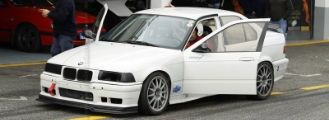
Vi este tópico num site americano (E46fanatics.com) e achei por bem pôr aqui para o pessoal que estiver interessado em fazer isto ter mais bases para o fazer. Tal como está explicado, isto pode aplicar-se a grelhas cromadas ou não, o prioncípio é exactamente o mesmo.
É muito simples, e poupa-se dinheiro sem ter que se comprar novas grelhas. E se se fartarem do look que puseram, é só pintar outra vez.
Aqui vai então:
___________________________________________
Hey all,
I had been recently contemplating replacing my chrome kidney grills on my 2004 facelift coupe with either all matte black, or body color surrounds with black inserts. It would cost about 50 bucks plus shipping for all black, or a little over 100 bucks for body color surrounds with black inserts from a vendor.
Not wanting to spend that, and also being the DIY type, I decided to paint my chrome grills with Alpine White surrounds and matte black inserts. I checked the DIY's on the forum for this, but most weren't that detailed and I didn't find any for painting the surrounds body color. So, I have put together this DIY with photos of the process I used to do this.
As of now, I haven't finished putting the grill back together and back on the car yet, so I'll post what I have done so far, and update tomorrow when I complete the job.
First step was to decide what paint and other materials I would need to do the job. I wanted this to look like it came from the factory when I was done, so I wanted to get a good paint match and something that would be durable. Based on a forum search I decided that Duplicolor would be acceptable. I did some research and the Duplicolor "Import" color Super White II was very close to Alpine White. I could have gone with a can of Alpine White spray from paintscratch or Ebay or somewhere, but at 15-20 bucks a can plus shipping and waiting for it to arrive, I decided to go with the Duplicolor. If I screw it up, I can always repaint or buy a grill from a vendor. I also picked up a can of Duplicolor Semi Gloss black acrylic automotive paint for the inserts. I already had a can of Rustoleum clear gloss and clear flat from a previous job, so I didn't have to buy those. I decided on going with some primer designed for plastics so I would get good adhesion from the paint. Then I picked up a pack of 100-150-220 sandpaper and that was it for paint and materials. Total cost was under 20 bucks.
After buying the materials, it was time to remove the grills from the car. To do this, open the hood and look at the back of the grills from the inside. You'll see six black plastic tabs in the shape of a triangle holding each grill to the hood. I found the easiest way to remove them was to press in the two bottom tabs while simultaneously gently pressing the grill outwards. Then I did the same with the side tab. I didn't even have to mess with the others, since once I freed the two bottom tabs and the side tab, the grill popped right out. This was the same with the other side, and I didn't break any tabs. All in all, pretty simple. The pics below show the grill once it's been removed from the car. Each grill is made up of two pieces; the surround piece on the outside, and the slats piece from the inside. My grills came off the car with the two pieces still connected together.
In the pic below, you can see the two black triangular plastic tabs that hold the grill to the car. Also, you can see the tabs where the surround piece clips to the slats piece. To remove, work around freeing each tab and the two pieces will come apart.
Once separated, it was time to sand the pieces to prepare for paint. This is a critical step, since paint needs a "rough" surface to adhere to. Even though I was planning on using plastic primer prior to painting, I didn't want to risk any issues with paint bubbling or flaking off of the smooth chrome surface of the stock grills. I used 150 grit sandpaper to sand each piece, followed by 220. The 220 probably isn't even necessary, but I used it anyway. The sanding was by far the most tedious part of the project, it probably took me an hour and a half or so just to complete that part.
Sanding the surrounds:
Sanded surround on the left, stock on the right. The sanded down surround has a stainless steel look to it:
The slats, with the chrome face sanded, and the sides of each slat sanded:
After sanding, I washed all the pieces with dish soap and water, to remove all the sanding dust and also remove any oils from fingerprints. This is important, as paint will often bubble up where any fingerprint residue is present. Once washed and dried, the next step was to prime and paint. I decided to prime the parts with primer for plastics, and I used two coats. This is a clear primer that bonds with the plastic. I sprayed each coat about 15 minutes apart, and then let dry for an hour before applying the first color coats. I sprayed the first coat of black on the grills, and then sprayed the first coat of white on the surrounds. The first coat was pretty light, as I planned on using multiple coats and didn't want any running, sagging, or drying issues with heavy coats. Patience is key here.
Painting surrounds white:
Painting slats black:
It came out great, after drying I clipped the surrounds and the slats back together and it looks sick. It looks like it came right from the factory. Here are the finished grills, prior to going back on the car:
I'll post some pics later of the grills installed on the car. Hopefully this helps anyone who is planning on painting the grills. I don't know how well they will hold up over time, but I figured it was worth a shot to do this and save the money over buying grills OEM or from a vendor
_________________________________________


